Quick Start
This walks through a first inspection from an empty scene to reading results.
-
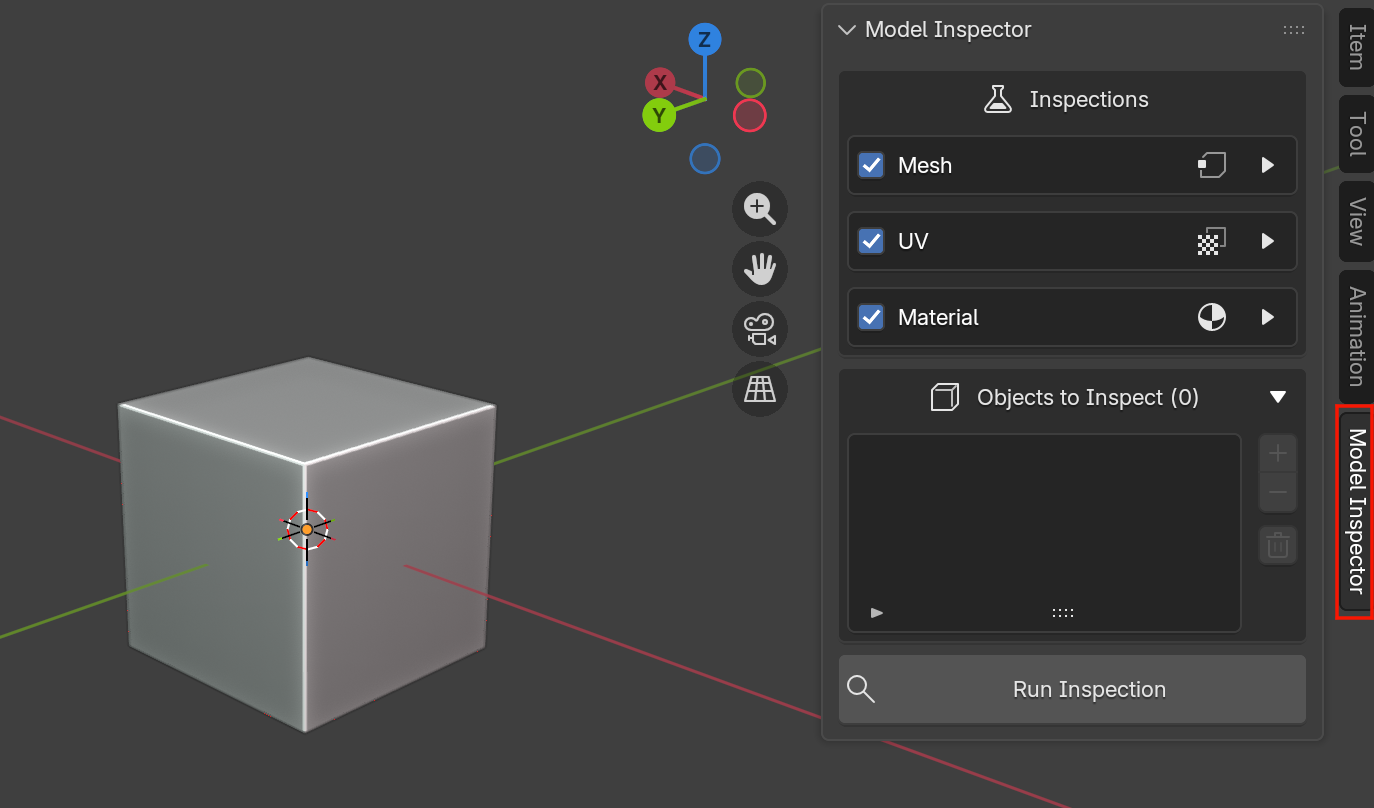
Open the panel. In the 3D Viewport, press N to open the sidebar, then select the Model Inspector tab.
-
Select objects. In the viewport, select one or more mesh objects you want to inspect.
-
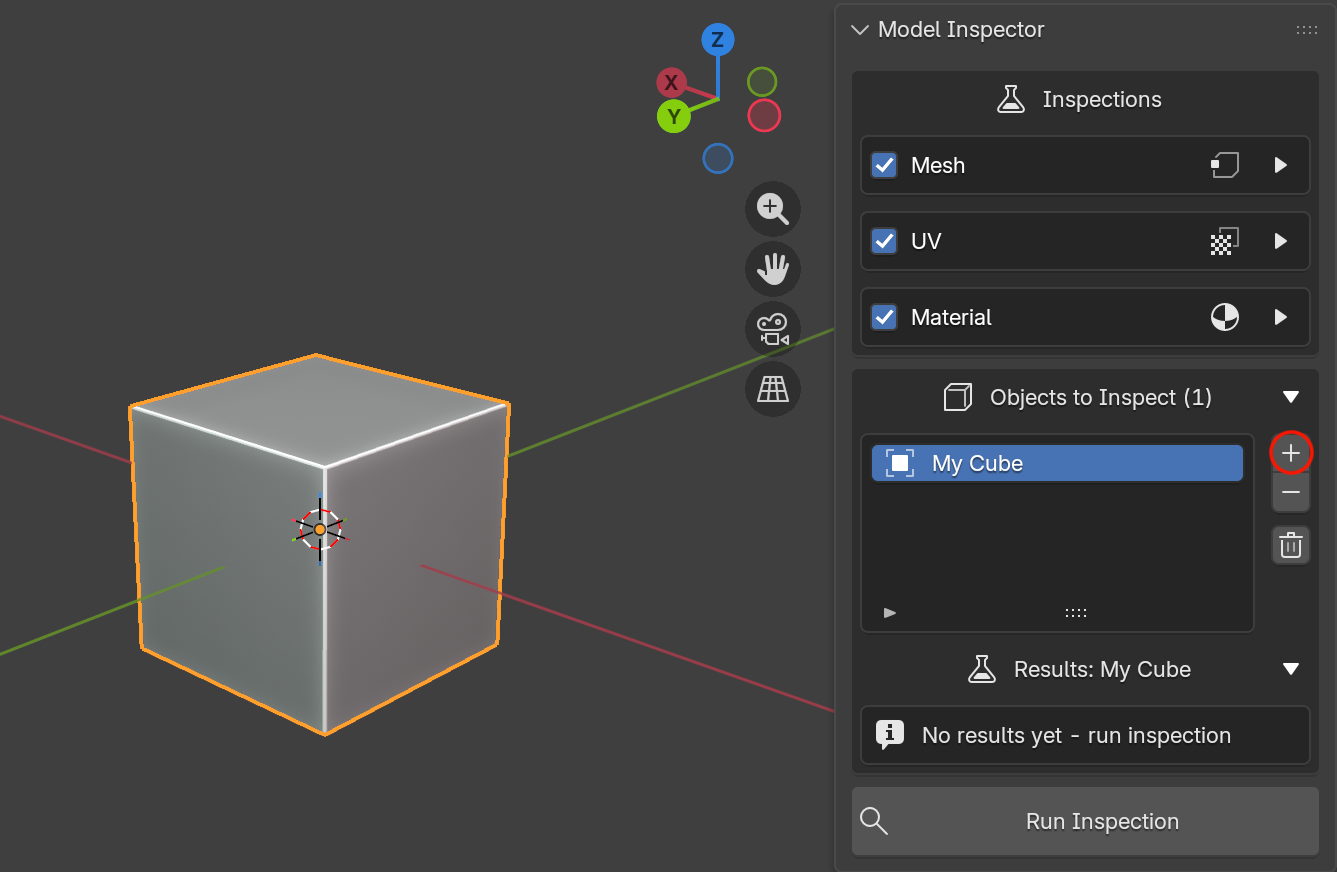
Add them to the inspection list. In the Objects to Inspect box, click ➕ to add the current selection.
-
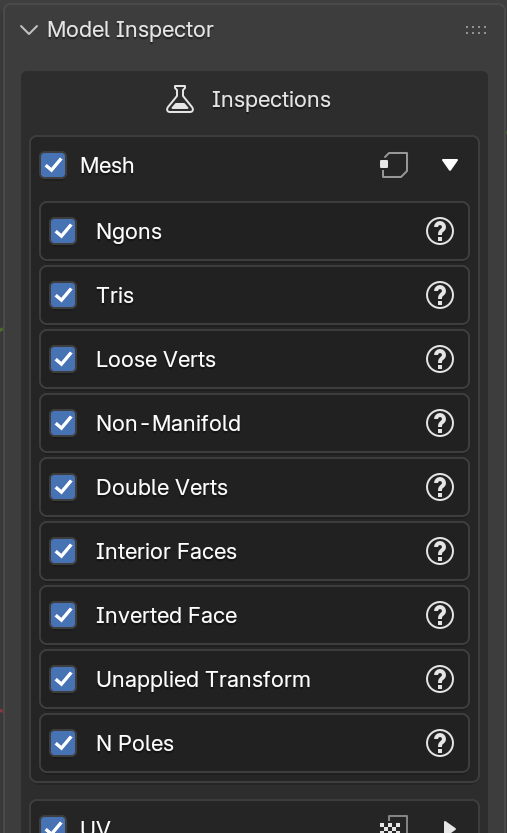
Choose what to inspect. In the Inspections box, tick or untick the Mesh, UV, and Material categories. Expand a category to enable or disable individual inpsections. You can hover over the ❓ icon next to any inspection for a description of what it looks for.
-
Run Inspection. Click the Run Inspection button at the bottom of the panel.

-
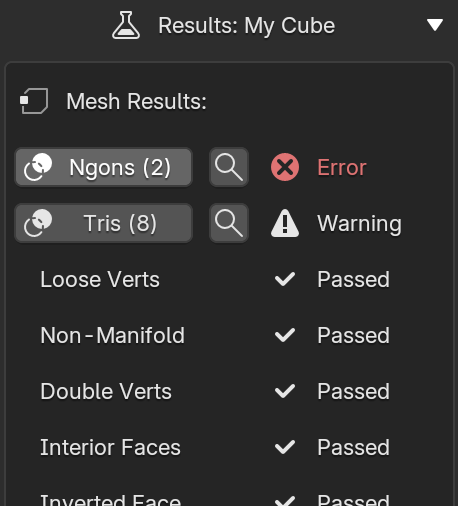
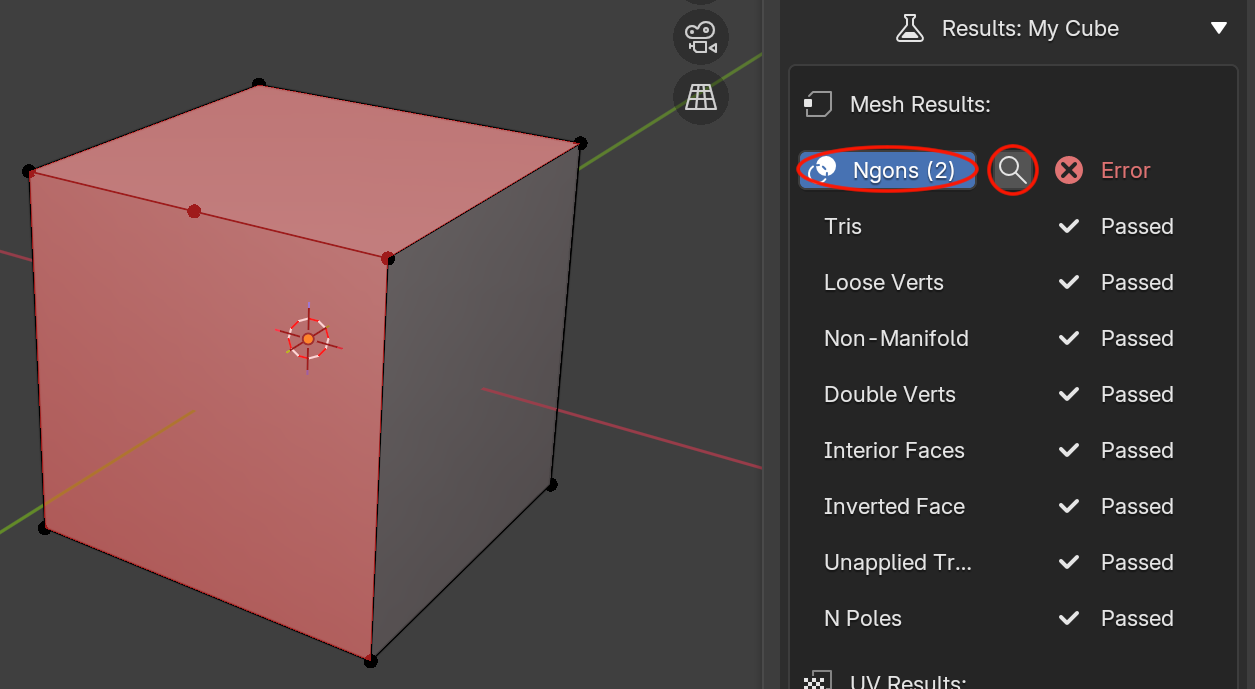
Read the results. Select an object in the list to see its results grouped by category, with a pass/warning/error icon and an infraction count next to each check.
-
Locate problem geometry. Some results come with an overlay with a colored overlay toggle in the viewport showing exactly which faces, vertices, or edges were flagged. Click the 🔍 magnifying glass next to a result to zoom the viewport straight to that geometry.
-
IMPORTANT. To get the must up to date results, if you make any changes to your model, you MUST RE-RUN YOUR INSPECTION
That's the whole loop. For a deeper look at each part of the panel, see the User Guide.